Sound Redesign Developed September 2025
God of War: Ragnarök

Project Breakdown
Contents
Here is my breakdown of my sound redesign for God of War, broken up into different segments explaining my workflow and process on the project.
redesign clip
Project presentation and management

Project Overview
My first concern with my project was its layout and organisation. This element was crucial for time management and ease of use throughout the entirety of this project.
To save myself time and create a more user-friendly experience, I used:
Track Stacks (Folders) to isolate each highlighted SFX, for easy manipulation and control, as well as saving CPU/RAM limitations.
Colour Coded for visual assistance.
Appropriately named tracks to avoid confusion with potentially altering the wrong track/region.
Timeline Markers to section areas of the clip for visual aid.
External Storage/Folder Management in Finder to incorporate all relevant files to the God of War project, including Wavs, Raw foley work, Demos, Logic X Files and Evidence screenshots/screen recordings to post on my website.

Project Layout
-Track Stacks (Folders)
-Appropriately names tracks
-Timeline Markers
-Colour Coding
-Region names that reflect track names

Folder Organistation
Track Subgroups
Track Stacks were my most important quality regarding organisation in this project, they helped me isolate each style of effect into SFX subgroups, allowing me to quickly locate specific tracks as well as easily mix a group of tracks without duplicating or over extending use of effects, which would massively drive down my RAM/CPU capabilities on my computer. Here is the list of my created Track Stacks, with what audio is featured inside:
This list is also compiled in the order I produced the audio for this project.
Ambience - Wind, Waterfall sounds - Any audio that supports world building.
Environment - Box breaks, Vine entrapments - Any object/Alteration to the world around the player, caused by the player/enemies.
Player - Footsteps, Armour movement, Vocals, Weapon selects
Enemies - Footsteps, Armour Movement, Vocals, Weapon selects
Impacts - Any hits with assisted low end kicks to support.
Magic/Sp. Moves - Any main special attack or moment within the gameplay.
Inside each Track Stack are all the relevant audio regions required to build the sound effect I was aiming for, each including their own unique range of effects, panning and volume controls.

Track Subgroups
aUDIO cAPTURE
Any Foley work and field recordings were captured using my Zoom H4n hand recorder and Rode NTG2 short shotgun condenser microphone, seen to your right.

Zoom H4n

Rode NTG2

Setup with added windshields and mounts
Field Recordings were strictly captured using my Zoom’s built-in microphones, as they have the ability capture audio up to a span of 120 degrees, allowing for a wider, more dynamically consistent take. This was particularly important regarding captures for ambience and environmental recordings, as long as you have a windshield equipped.
Any specific foley recordings were captured with the NTG2, a condenser microphone which is extremely useful for capturing the sonic detail of the object you are working with. With the use of this microphone, it was essential to have a well controlled environment to record in, to avoid unwanted audio spill, despite its super-cardioid polar pattern, which captures audio strictly in front of the microphone and avoiding anything else.
Alternatively, If foley/field recordings weren’t suitable for the visuals on screen, I would turn to various SFX libraries to collect more outlandish sounds to help support my structured material.
Combined, these three processes built up my project from the ground up. Supplying myself with the first complete demo of my project.
Next were the effects.
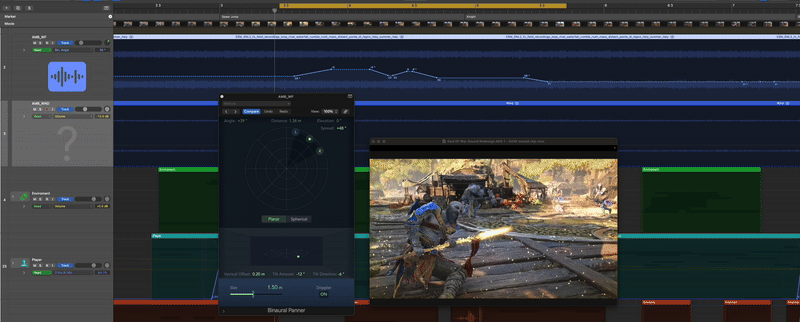
Binaural Panning
Layering effects
Ambiences and Environmental sounds:
On the outset of my work, I decided to start with locational sounds like Ambiences and Environments to build a general structure for my mix, making sure the dB is low enough to accommodate headroom for louder SFX like impacts and special moves, avoiding clipping and going over my 0.2dB threshold.
What really made my ambiences stand out, was the use of automation panning with the binaural panner, which allowed me to sculpt and wrap sounds such as the waterfall in the background around the player, depending on his direction, creating a better sense of immersion, reflecting the movement visually.
Player and Enemy sounds:
I found that player and enemy sounds, other than vocal work was held lower in the mix than the louder impact
Sound Effects:
Creative Decisions and Sound creation
To conclude the clip, I wanted to end on something that would catch the listeners attention. The final punch segment at the end incorporates slow motion, as well as a cut to black, which I intentionally incorporated on the video editing side of the clip, using DaVinci Resolve.
To create my slow motion effects, I used a range of third party effects, and automated elements within them to reflect the idea of time slowing down. For worldly sfx like ambiences, I automated the volume down, to give the sense of sound being dragged out around the player.
Here you will find a collection of effects I used and how I automated them to produce the result heard in the final clip:
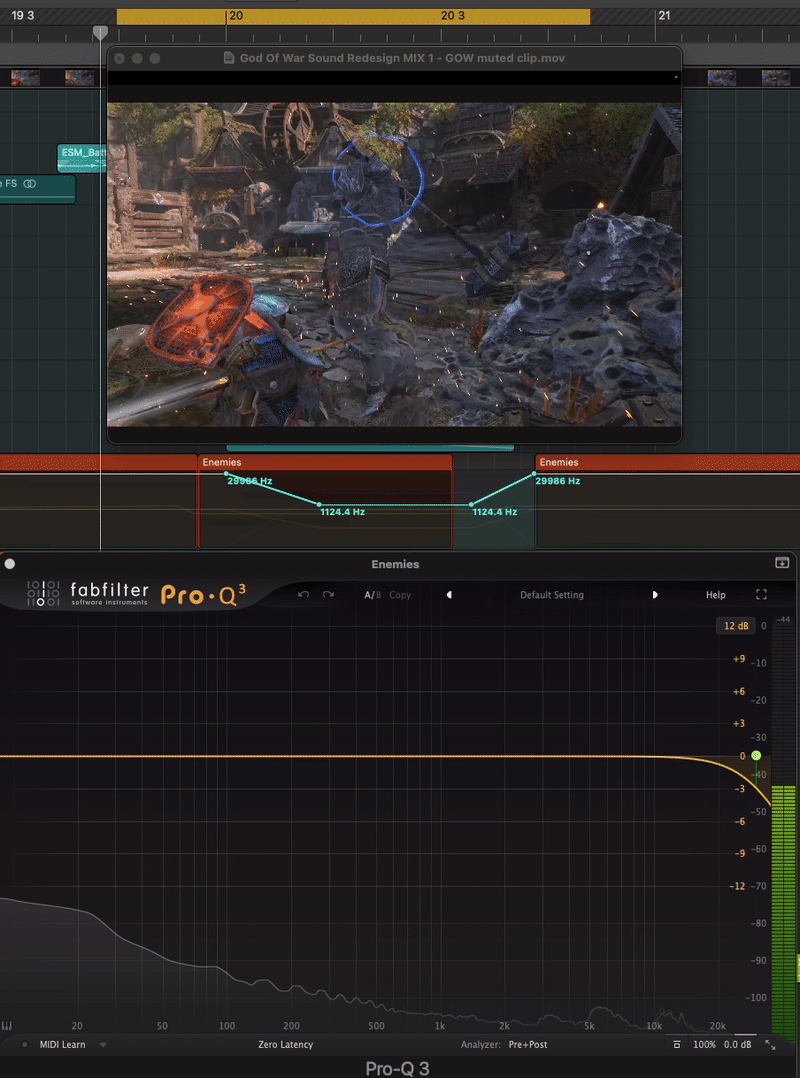
Fabfilter - ProQ3: An Equalisation tool.
Using a High Cut from 30k to 1k, to drag details out of the mix, emphasising the change in pace.
This effect was used on Player, Enemy, Impact and Ambience
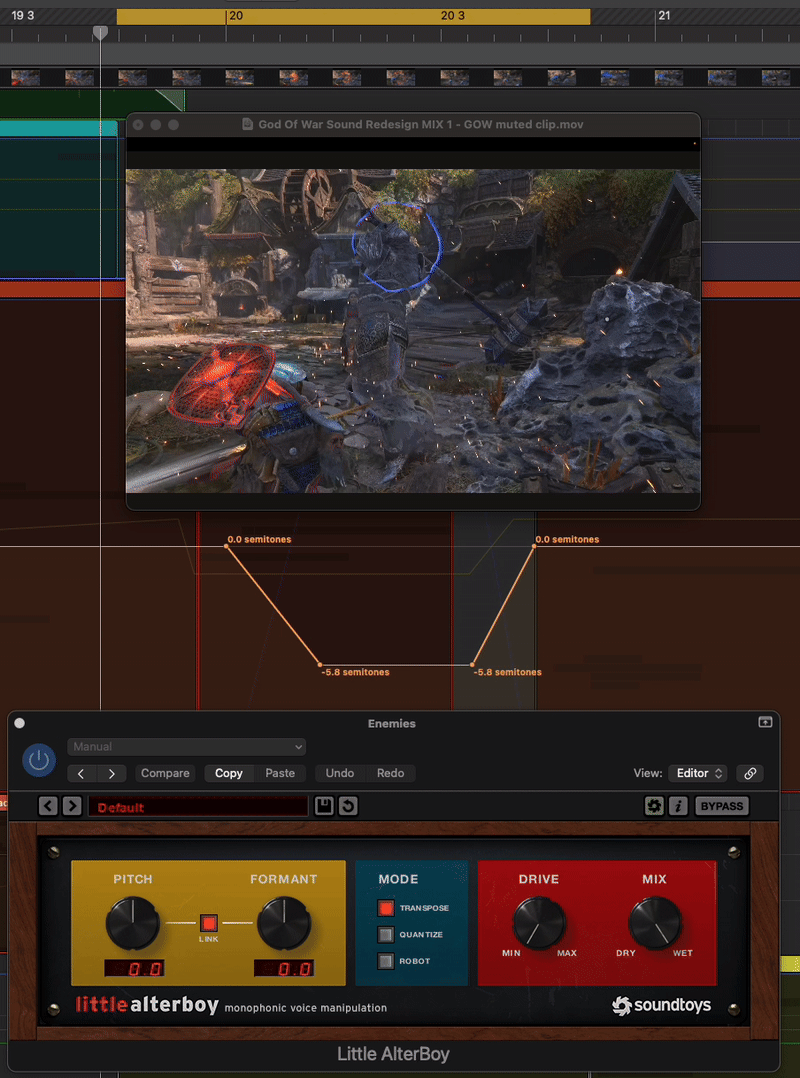
Soundtoys - Little Alterboy: A Pitch and formant altering effect.
Lowering the pitch from 0 to -5.8 semitones at the start of the slow motion segment, until time catches up again.
This effect was used on Player, Enemy and Ambience
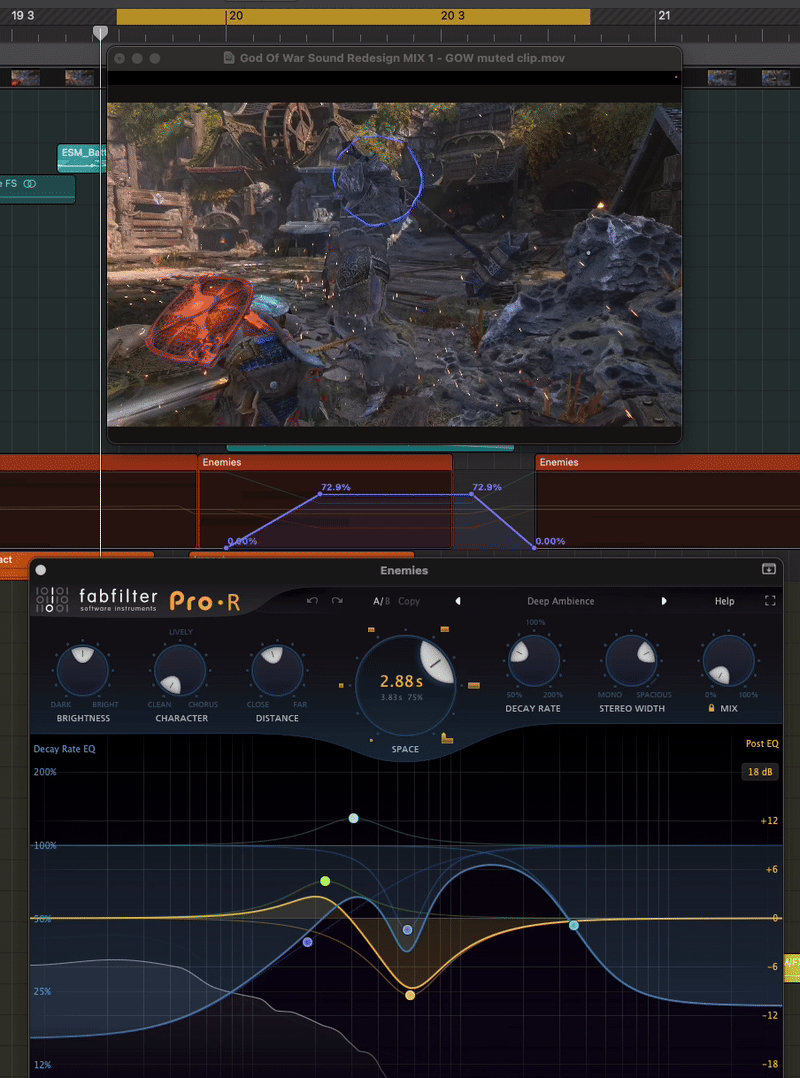
Fabfilter - ProR: A Reverb and space recreation tool.
For this, I added an additional heavy reverb specifically for the slow motion effect, bypassing it for the rest of the clip. I automated from 0% - 75%, supporting the idea of the world slowing down around the player. This was also technically useful when time stretching regions, as it blended the gaps in audio that was captured under the desired 48kHz sample rate.
This effect was used on Player, Enemy, Impact and Ambience
Fabfilter: Pro R
Soundtoys: Little Alterboy
Fabfilter: Pro Q3

Mixing and volume control
Once I had compiled all sounds and effects, and was comfortable with my rough mix, I decided to focus more on the volume range of my project. I was trying to create as much space sonically as possible to allow the punchy sounds to carry through, with more impact and satisfaction. The downside to this however, is when creating too much space, certain quieter sounds such as ambiences tend to fall off, and not be heard.
To visualise this, i have created a general bar chart that shows my approximate goals in dB.
Supported images and Gifs
-
![]()
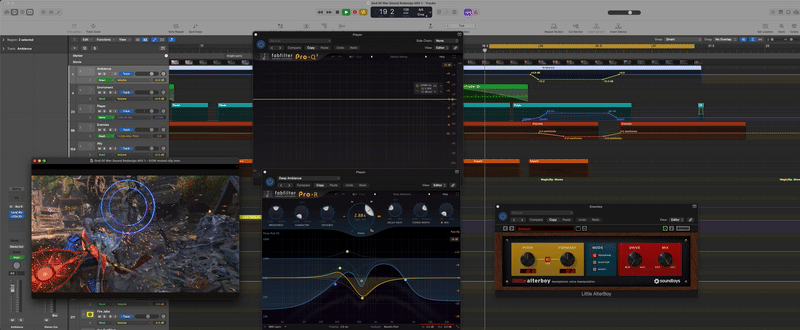
Project Overview
Complete view of my God of War redesign project
-
![]()
Automation
Final Punch Slow Motion Segment
-
![]()
dB chart
Showing average volume goals in dB
-
![]()
Binaural Panning
Automated dependent on the direction of the player